The Best Banana Bread Recipe (Moist, Simple, One Bowl)
If you’ve ever baked banana bread and wondered why some loaves turn out moist and tender while others feel dry and crumbly, the answer isn’t in the recipe. It’s in the bananas themselves.
Those spotty, almost-too-far-gone bananas you keep pushing to the back of the counter? Those are exactly what you need. They aren’t just for flavor — they bring natural sweetness, moisture, and structure. The riper they are, the better your bread will be.
This is a one-bowl recipe. No stand mixer. No complicated technique. Just mash, stir, fold, and bake. The hardest part is waiting for the loaf to cool before you slice into it.
And if you want to add chocolate chips, walnuts, or both — go ahead. Banana bread is forgiving like that.
Watch the entire process from mashing to baking in 60 seconds
The riper the bananas, the better the bread. Brown spots are your friend.
Why This Recipe Works
Melted butter instead of softened. It mixes more easily and creates a denser, moister crumb. You don’t need a mixer — just a bowl and a spoon.
Minimal mixing. Banana bread is a quick bread, not a yeast bread. The less you stir, the more tender it stays. Overmixing develops gluten, which makes the texture tough and chewy.
No mixer required. This is the kind of recipe you can make at 10 p.m. when you realize you have three overripe bananas and no plans for them. It’s that simple.
Recipe
The Best Banana Bread
Yield
1 loaf (8-10 slices)
Prep
10 min
Rise
—
Bake
55-65 min
Total
~1 hr 10 min
Ingredients
Wet Ingredients
- 3 large ripe bananas (about 1½ cups mashed)
- ⅓ cup unsalted butter, melted
- ¾ cup granulated sugar
- 2 large eggs, room temperature
- 1 tsp vanilla extract
Dry Ingredients
- 1½ cups all-purpose flour
- 1 tsp baking soda
- ½ tsp salt
- ½ tsp ground cinnamon (optional)
Optional Add-Ins
- ½–1 cup chocolate chips
- ½–1 cup chopped walnuts or pecans
Equipment
- 9×5-inch loaf pan
- Large mixing bowl
- Fork or potato masher
- Wooden spoon or rubber spatula
- Whisk
- Cooling rack
- Toothpick or cake tester
Phase 1
Prep the Bananas
Preheat your oven to 350°F (175°C).
Grease a 9×5-inch loaf pan with butter or line it with parchment paper. Greasing prevents sticking, but parchment makes it even easier to lift the loaf out cleanly once it’s baked.
Mash the bananas.
Peel the bananas and place them in a large mixing bowl. Use a fork or potato masher to mash them until mostly smooth — a few lumps are fine. You want about 1½ cups of mashed banana. The riper the bananas, the sweeter and more flavorful your bread will be. Look for bananas with lots of brown spots.
If your bananas aren’t ripe yet, put them in a 300°F oven for 15–20 minutes until the skins turn black. Let them cool slightly before peeling. The insides will be soft and sweet.
Phase 2
Mix the Batter
Add the wet ingredients.
Pour the melted butter into the bowl with the mashed bananas and stir to combine. Add the sugar, eggs, and vanilla extract. Mix until everything is well blended — you should have a thick, slightly lumpy mixture.
Whisk the dry ingredients.
In a separate bowl (or just measure directly into the banana mixture if you’re confident), whisk together the flour, baking soda, salt, and cinnamon. Whisking helps distribute the baking soda evenly, which is what gives the bread its rise and tender crumb.
Don’t skip the whisking step. Unevenly distributed baking soda can create bitter pockets in the finished loaf.
Fold the dry into the wet.
Add the flour mixture to the banana mixture. Stir gently with a wooden spoon or rubber spatula until just combined. You should still see a few streaks of flour — that’s fine. Overmixing develops gluten, which makes the bread tough and dense instead of tender.
Use a folding motion: scrape the bottom of the bowl and lift up and over. Stop as soon as you don’t see dry flour anymore.
Add your mix-ins (optional).
If you’re adding chocolate chips, nuts, or both, fold them in now. Start with ½ cup if you want them as an accent, or go up to 1 cup if you want them in every bite. Toss them in a little flour first to help prevent sinking.
Phase 3
Bake and Cool
Pour into the pan.
Scrape the batter into your prepared loaf pan. Use your spatula to spread it evenly and smooth the top. It should come about two-thirds of the way up the sides of the pan.
Bake for 55–65 minutes.
Place the pan in the center of your preheated oven. Bake until the top is golden brown and a toothpick inserted into the center comes out clean or with just a few moist crumbs. Start checking at the 55-minute mark. If the top is browning too quickly, tent it loosely with aluminum foil for the last 10–15 minutes.
Every oven is different. A few extra minutes won’t hurt — underbaked banana bread is gummy in the middle.
Cool in the pan for 10 minutes.
Once the loaf is done, remove it from the oven and let it sit in the pan for 10 minutes. This gives it time to firm up slightly, making it easier to remove without breaking.
Turn out onto a cooling rack.
Run a butter knife around the edges of the pan to loosen the loaf, then turn it out onto a wire cooling rack. Let it cool completely before slicing — at least 30 minutes. The bread should have a golden-brown crust that crackles slightly as it cools. That’s the sign of a perfectly baked loaf.
Tips From Our Kitchen
For extra-moist bread
Replace ¼ cup of the melted butter with sour cream or Greek yogurt. The acidity balances the sweetness and adds incredible moisture.
For chocolate banana bread
Add ¼ cup cocoa powder to the dry ingredients and reduce the flour to 1¼ cups. Fold in ¾ cup chocolate chips. You’ll get a rich, fudgy loaf that barely qualifies as breakfast.
For storage
Wrap the cooled loaf tightly in plastic wrap or store in an airtight container at room temperature for up to 4 days. It actually gets better on day two. For longer storage, freeze individual slices wrapped in foil — they thaw in minutes and taste freshly baked.
For muffins instead
Divide the batter into a greased 12-cup muffin tin and bake at 350°F for 18–22 minutes. Perfect for grab-and-go breakfasts.
The Final Slice
This is the kind of recipe that gets requested. The kind people ask you to make for potlucks, breakfast gatherings, and lazy Sunday mornings. Not because it’s complicated or impressive — because it’s simple and it works every single time.
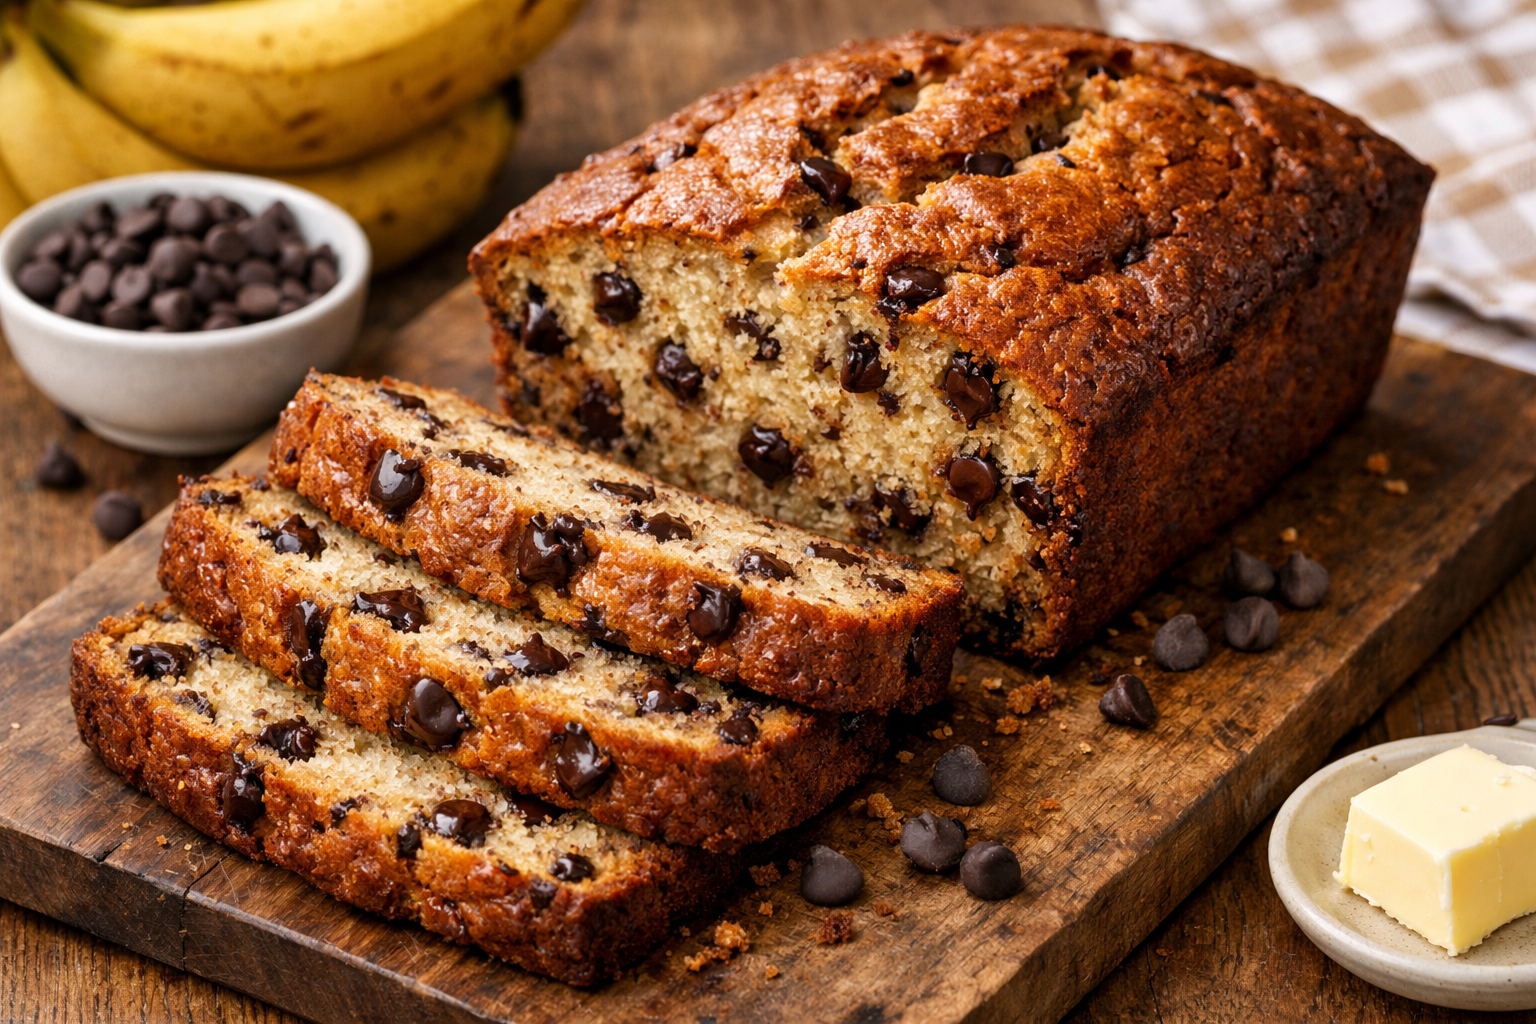
The bread should have a golden-brown crust that crackles slightly as it cools. The inside should be tender, moist, and just sweet enough. And if you added chocolate chips, you should see them peeking out from every slice.
Good bread starts with good ingredients, but it also starts with good tools. A reliable loaf pan that bakes evenly. A wooden spoon that feels solid in your hand. A cooling rack that lets air circulate so the bottom doesn’t get soggy. The small things add up.