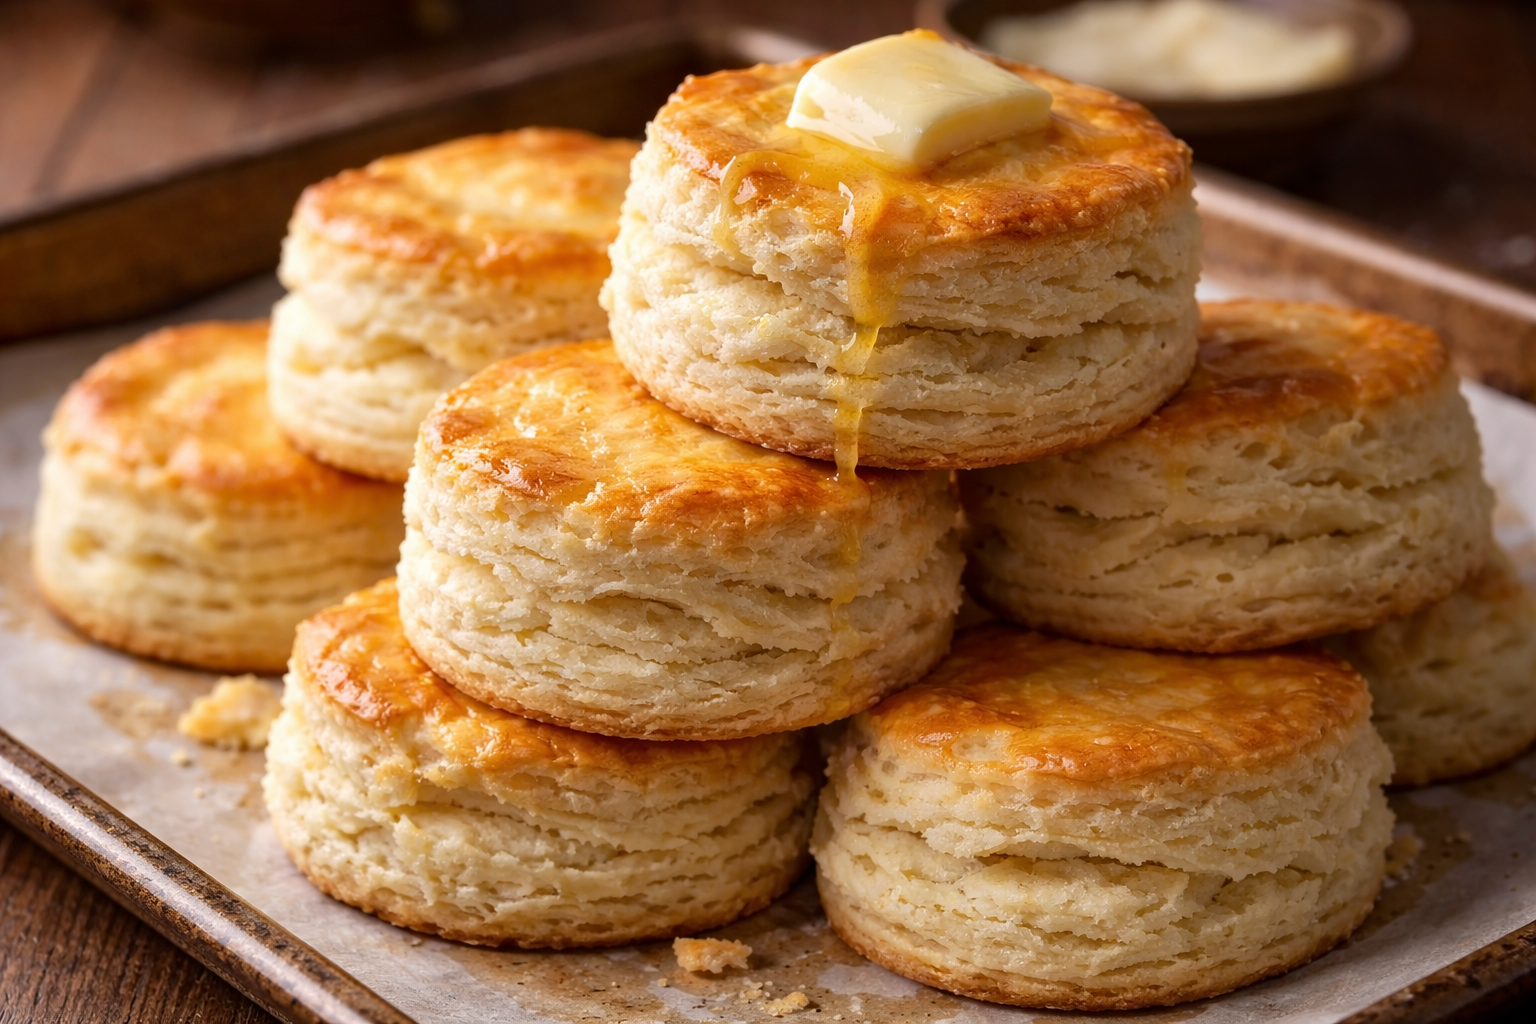
Fluffy Homemade Biscuits With Buttery Layers (30 Minutes)
Good biscuits don’t take long. Thirty minutes from counter to table. But they do require a shift in how you think about dough. You’re not trying to smooth it out or bring it together into a perfect ball. You’re trying to leave it alone. The less you touch it, the better it gets.
That shaggy, barely-holding-together mess you’re staring at after mixing? That’s exactly what you want. Those uneven chunks of butter that look too big? They’re about to turn into pockets of steam that puff the dough into tall, flaky layers.
This recipe makes 8 to 10 biscuits. You’ll eat half of them while they’re still warm, standing at the counter, tearing them open with your hands and watching the steam rise. The other half won’t last until dinner.
See the folding technique and key tips in under 60 seconds
The secret to tall biscuits isn’t technique. It’s restraint. Stop mixing sooner than you think you should.
The Golden Rules
There are three things that separate tall, flaky biscuits from flat, dense ones. Get these right, and the rest is just following the steps.
1. Embrace the Chill
Freeze your butter solid before you start. Not cold.Frozen. When frozen butter hits a 425°F oven, it melts and turns to steam instantly. That steam pushes the dough upward, creating those sky-high layers. Room temperature butter just blends into the flour and you end up with something closer to cake.
2. Do Not Overwork the Dough
Every extra stir, every extra knead, develops gluten. Gluten makes bread chewy and strong. That’s great for a baguette. Terrible for a biscuit. Mix until there’s no dry flour visible, then stop. The dough should look rough and shaggy. If it looks smooth, you’ve gone too far.
3. The Cutter Conundrum: Press Straight Down
When you twist the biscuit cutter, you seal the edges of the dough together. Sealed edges can’t rise. Press straight down with confidence, lift straight up, and place the biscuit on the pan. Don’t twist. Ever.
Recipe
Fluffy Homemade Biscuits
Yield
8-10 biscuits
Prep
10 min
Rise
None
Bake
12-15 min
Total
~30 min
Ingredients
- 2½ cups all-purpose flour, plus extra for dusting
- 1 tbsp baking powder
- ½ tsp baking soda
- 1 tsp salt
- 1 tbsp granulated sugar
- ½ cup (1 stick) unsalted butter, frozen
- ¾ cup cold buttermilk
Egg Wash
- 1 large egg
- 1 tbsp whole milk
Equipment
- Large mixing bowl
- Box grater or food processor
- Fork or pastry cutter
- Round biscuit cutter (2½ to 3 inches)
- Baking sheet + parchment paper
- Pastry brush
Phase 1
Prep the Dough
Freeze the butter.
Place the butter in the freezer for at least 30 minutes before you start. You want it rock-solid — this is what creates those pockets of steam that puff the biscuits into tall, flaky layers. If you skip this step, you’ll still get biscuits, but they’ll be flat and dense.
Wrap the stick of butter in plastic wrap before freezing so it doesn’t pick up freezer odors. Some bakers keep a stick in the freezer year-round just for biscuits.
Combine the dry ingredients.
In a large bowl, whisk together the flour, baking powder, baking soda, salt, and sugar. Whisk well — at least 30 seconds. You’re trying to evenly distribute the leavening agents so every biscuit rises the same way.
Grate the frozen butter.
Using the large holes of a box grater, grate the frozen butter directly into the flour mixture. Toss gently with your hands after every few strokes to coat the butter shreds in flour. This prevents clumping and helps distribute it evenly. Work quickly so the butter doesn’t warm up.
If you have a food processor, pulse the flour mixture and frozen butter cubes for 5–6 pulses until it looks like coarse crumbs. Don’t overprocess or you’ll lose the flaky texture.
Add the buttermilk.
Make a well in the center of the flour-butter mixture. Pour in the cold buttermilk all at once. Use a fork to gently fold the mixture together, starting from the edges and working inward. Stop as soon as no dry flour is visible. The dough will look shaggy and rough — that’s exactly what you want.
Don’t overmix.
This is where most people go wrong. Every extra stir develops gluten, and gluten makes biscuits tough. If you see a few dry spots, that’s fine — you’ll bring it together in the next step. Resist the urge to keep stirring.
The dough should be sticky and barely holding together. If it’s wet and soupy, add a tablespoon of flour. If it’s too dry to come together, add buttermilk one teaspoon at a time.
Phase 2
Shape the Biscuits
Turn out onto a floured surface.
Dust your counter or a large cutting board with flour. Turn the shaggy dough out onto it. Dust the top lightly with more flour. Pat the dough gently into a rough rectangle about ¾ inch thick. Use your hands, not a rolling pin — you want to handle it as little as possible.
Fold for layers.
This is the secret to tall, flaky biscuits. Fold the dough in thirds like you’re folding a letter — left third over the center, then right third over that. Rotate the dough 90 degrees, pat it back out to ¾ inch thick, and fold again. Repeat one more time for a total of three folds. Each fold creates more layers.
If the dough feels sticky at any point, dust it lightly with flour. But don’t add too much — you want the dough to stay soft and pliable.
Cut the biscuits.
Pat the dough out one final time to ¾ inch thick. Press your biscuit cutter straight down into the dough — don’t twist. Twisting seals the edges and prevents the biscuits from rising properly. Lift straight up, place the biscuit on a parchment-lined baking sheet, and repeat. Space them about 1 inch apart for crispy sides, or touching for soft sides.
Use a sharp-edged cutter, not a drinking glass. Dull edges compress the dough and ruin the rise.
Handle the scraps carefully.
Gather the leftover dough scraps gently and press them together — don’t re-knead. Pat out to ¾ inch thick and cut a few more biscuits. These won’t be quite as tall as the first batch because the dough has been worked more, but they’ll still be delicious.
Phase 3
Bake to Golden
Preheat the oven to 425°F (220°C).
Place a rack in the upper third of the oven. High heat is essential — it turns the butter into steam quickly, which is what makes the biscuits puff up. Let the oven come to full temperature before baking.
Brush with egg wash.
Beat the egg and milk together in a small bowl. Brush the tops of each biscuit gently with a pastry brush. This gives you that beautiful golden-brown finish. Don’t skip it — pale biscuits look sad.
If you don’t have a pastry brush, use a spoon to drizzle a little egg wash on top and spread it gently with the back of the spoon.
Bake for 12–15 minutes.
They’re done when the tops are deep golden brown and the biscuits have risen to about double their original height. The edges should be slightly crisp, and the bottoms should sound hollow when you tap them. If you pull them too early, they’ll be doughy inside.
Serve warm.
Transfer the biscuits to a wire rack to cool slightly — or don’t wait at all. Tear one open while it’s still steaming, slather it with butter and honey, and understand why people have been making biscuits this way for generations.
Tips From Our Kitchen
Why frozen butter matters
Cold butter creates steam pockets as it melts in the oven. Those pockets = layers. Room temperature butter blends into the dough and gives you a texture closer to cake. If you want tall, flaky biscuits, the butter needs to stay cold and solid until it hits the heat.
No buttermilk? Make your own.
Add 2 teaspoons of white vinegar or lemon juice to ¾ cup of whole milk. Stir and let it sit for 5 minutes until it curdles slightly. Use it just like buttermilk. The acidity reacts with the baking soda to give you extra lift.
Don’t twist the cutter
Twisting the biscuit cutter seals the edges and prevents the dough from rising evenly. Press straight down with confidence, then lift straight up. If the dough sticks to the cutter, dip it in flour between cuts.
What to do with leftover scraps
Press the scraps together gently — don’t knead them. Pat them out and cut a few more biscuits. They won’t be quite as tall because the dough has been worked more, but they’ll still taste great. Some people skip cutting and just bake the scraps as one rustic biscuit.
For drop biscuits (even faster)
Skip the folding and cutting. Add an extra 2–3 tablespoons of buttermilk to make the dough wetter. Scoop it onto the baking sheet with a large spoon or ice cream scoop. You lose the layers, but you gain speed and simplicity. Bake at 425°F for 10–12 minutes.
Why This Recipe Works
Biscuits are one of those recipes where understanding thewhy matters more than memorizing the steps. Once you understand that cold butter = steam = layers, and that gluten development = toughness, you can adjust on the fly. Dough too wet? Add a little flour. Too dry? Add buttermilk a teaspoon at a time.
The folding technique — patting the dough out and folding it in thirds three times — isn’t fussy or complicated. It’s just creating more layers. Each fold doubles the number of thin sheets of dough stacked on top of each other. When those sheets hit the heat, they separate and puff up. That’s what gives you those beautiful horizontal layers when you tear a biscuit open.
And if you’re the kind of person who wants to make biscuits every weekend — and once you taste these, you will be — the right tools make the process faster and cleaner. A sharp biscuit cutter gives you clean edges. A dough scraper keeps your counter tidy. A pastry brush makes the egg wash effortless. None of it’s required, but all of it helps.