Stop Guessing: The Right Wash for a Shiny Crust
You can bake the perfect loaf — airy crumb, beautiful rise, flawless flavor — and still end up with a crust that looks dull, pale, or just plain wrong. Not because you did anything wrong in the dough, but because you skipped the wash. Or used the wrong one.
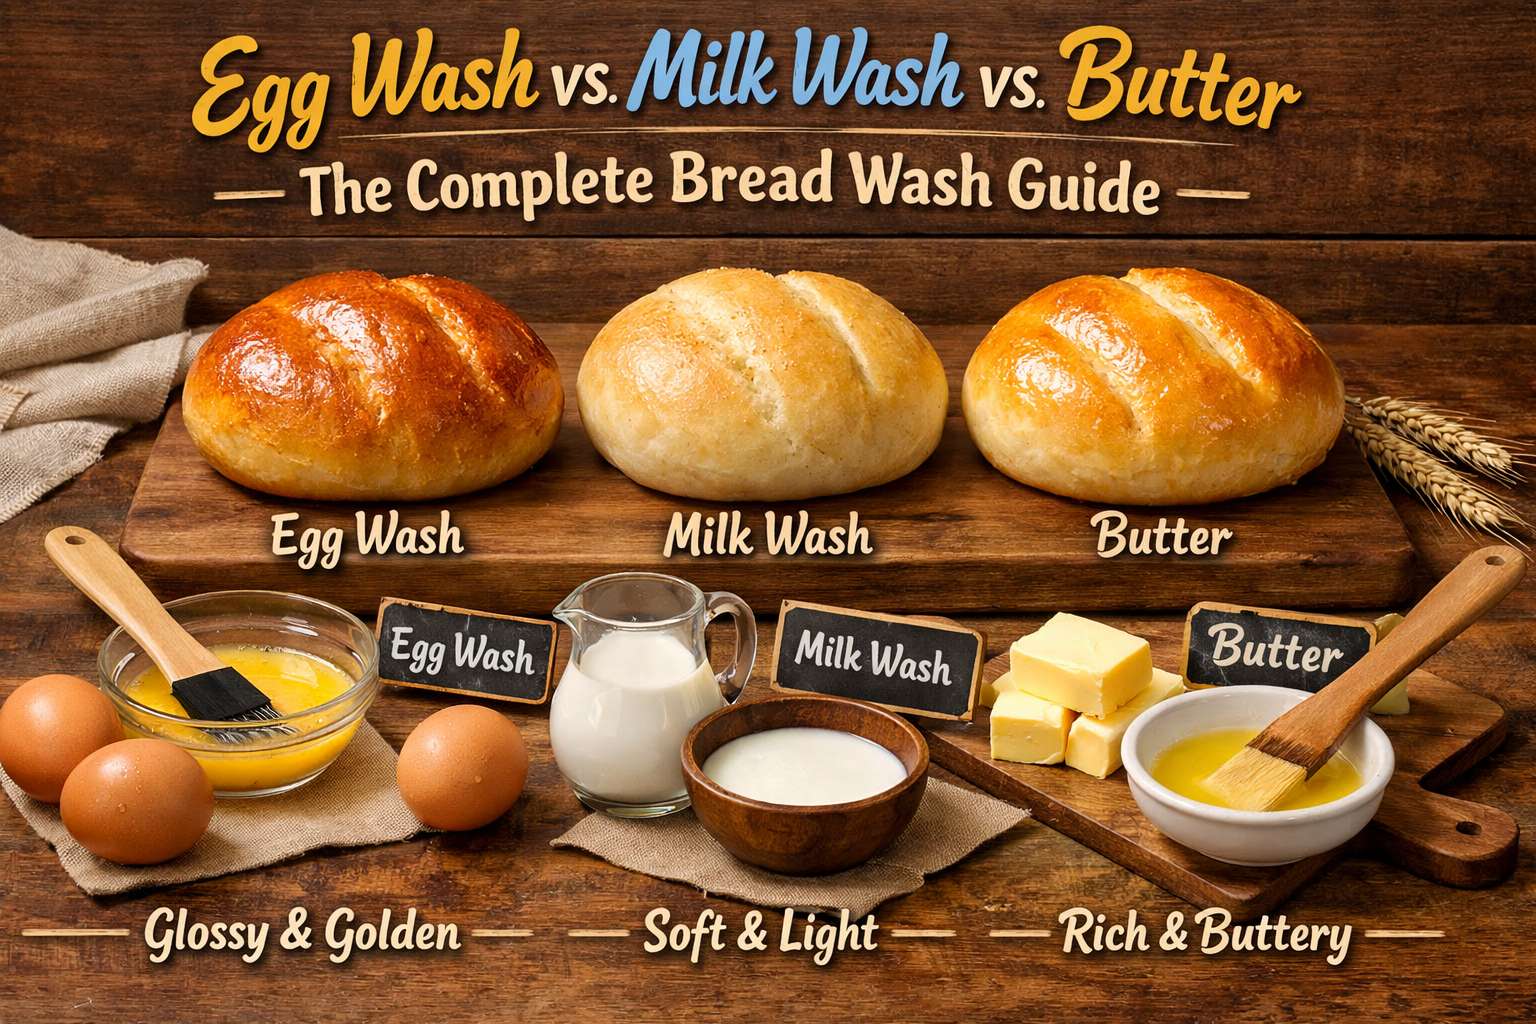
A bread wash is the final step before baking. It’s what gives your bread its color, its shine, and sometimes its texture. Egg wash creates that deep, glossy finish you see on brioche and burger buns. Milk wash gives you a softer, more subtle glow. Water makes the crust crisp and crackly. Butter keeps it tender.
Each one does something different. And knowing which to use — and when — is the difference between bread that looks homemade and bread that looks like it came from a bakery.
This guide breaks down every type of wash: what it does, when to use it, and how to apply it properly. No more guessing. No more pale loaves or sticky, over-brushed surfaces. Just the right finish, every time.
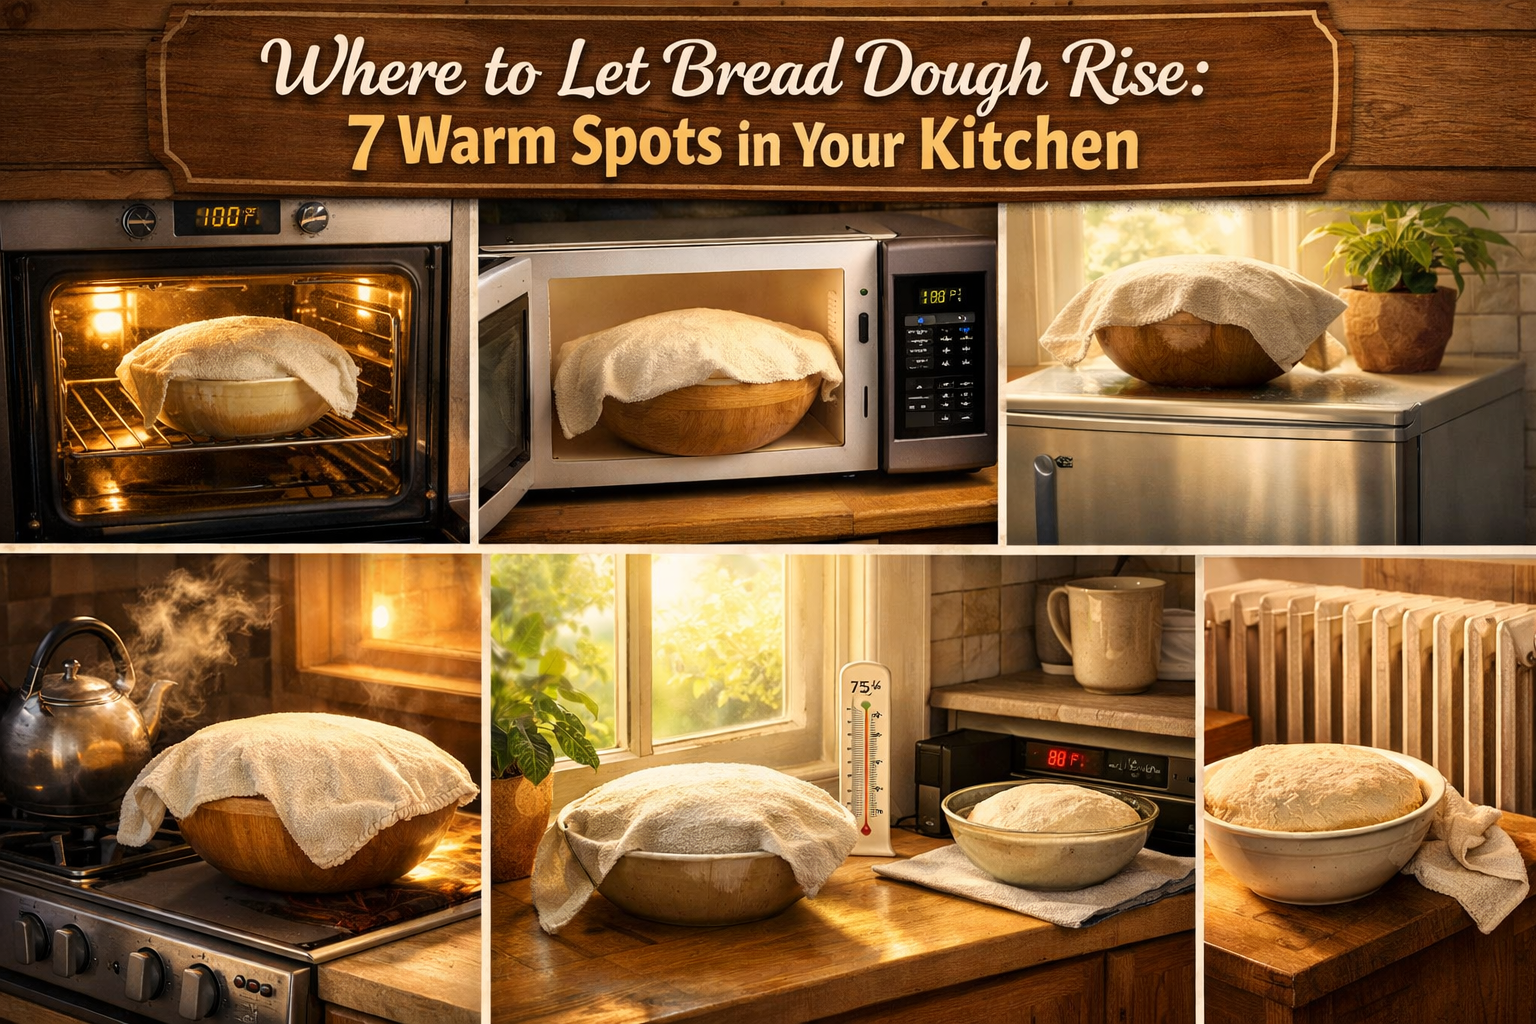
See the difference between egg wash, milk wash, and water in real time
The wash you choose is as important as the dough itself. It defines the first impression — and the final bite.
The Complete Bread Wash Breakdown
Here’s everything you need to know about the seven most common bread washes — what they do, how to use them, and which breads they work best with.
Whole Egg Wash
1 whole egg + 1 tbsp water
The Result: Deep golden color with a glossy, professional-looking finish
Texture: Smooth, shiny surface with moderate browning
Best For:
- Enriched breads (challah, brioche)
- Dinner rolls
- Burger buns
- Sandwich loaves
- Any bread where you want that bakery-quality shine
How to Apply:
Beat the egg and water together until smooth. Apply gently with a pastry brush just before baking. Use light, even strokes — don't let it pool in cracks or score marks.
When to Apply:
Right before the bread goes into the oven
Pro Tip: This is the most versatile wash. It's the one professional bakeries use for that signature golden glow.
Egg Yolk Wash
1 egg yolk + 1–2 tbsp heavy cream (or milk)
The Result: The richest, deepest golden-brown color with maximum shine
Texture: Glossy, almost lacquered finish with intense browning
Best For:
- Pastries (croissants, danishes)
- Challah
- Brioche
- Holiday breads
- Anything where appearance is critical
How to Apply:
Whisk the yolk and cream together until completely smooth. Brush on gently in a thin, even layer. Too much will create a thick, eggy film that can taste unpleasant.
When to Apply:
Just before baking
Pro Tip: Use this when you want dramatic color and shine. The fat from the yolk and cream creates an almost varnish-like finish.
Egg White Wash
1 egg white + 1 tsp water
The Result: Subtle shine without added color or browning
Texture: Light gloss, crisp surface
Best For:
- Lean breads (baguettes, ciabatta)
- Sourdough
- Rye bread
- Any bread where you want shine but not extra browning
How to Apply:
Whisk the egg white and water until frothy. Brush on lightly just before baking. This dries faster than whole egg, so work quickly.
When to Apply:
Right before baking
Pro Tip: Perfect for breads that already brown well on their own. It adds sheen without interfering with the natural crust color.
Milk or Cream Wash
Whole milk or heavy cream (no dilution needed)
The Result: Soft golden-brown color with a slight sweetness
Texture: Tender, matte to semi-gloss finish
Best For:
- Soft dinner rolls
- Biscuits
- Scones
- Sandwich bread
- Anything where you want a tender, not-too-shiny crust
How to Apply:
Brush milk or cream directly onto the dough surface. No need to thin it. Apply just before baking for best results.
When to Apply:
Just before baking
Pro Tip: The natural sugars in milk caramelize as they bake, giving you a soft golden finish and a hint of sweetness. Cream produces a richer result than milk.
Butter Wash
Melted unsalted butter
The Result: Soft, tender crust with a rich, buttery flavor
Texture: Matte finish, very soft and pliable crust
Best For:
- Dinner rolls
- Biscuits
- Garlic bread
- Focaccia
- Any bread where you want maximum softness and flavor
How to Apply:
Brush melted butter over the bread immediately after it comes out of the oven, while it's still hot. The heat allows the butter to soak in slightly. You can also brush it on before baking for extra richness.
When to Apply:
After baking (or before for double butter richness)
Pro Tip: Butter wash is the secret to those impossibly soft, pull-apart dinner rolls. It keeps the crust tender and adds a luxurious mouthfeel.
Water or Steam
Plain water, sprayed or brushed on
The Result: Crispy, crackly, deeply browned crust with no added richness
Texture: Crunchy, thin crust with an open, airy crumb inside
Best For:
- Baguettes
- Sourdough boules
- Artisan loaves
- Any lean bread where you want maximum crust crunch
How to Apply:
Spray or brush water on the surface right before baking. For even better results, add steam to your oven by placing a pan of water on the bottom rack or tossing ice cubes onto a preheated pan.
When to Apply:
Just before baking, and optionally during the first few minutes of baking
Pro Tip: Water and steam delay crust formation, allowing the bread to expand fully in the oven (called "oven spring"). The result is a thinner, crispier crust and a lighter interior.
Olive Oil Wash
Extra virgin olive oil
The Result: Light golden color with a slight crunch and herbal undertone
Texture: Semi-crisp, slightly chewy crust
Best For:
- Focaccia
- Ciabatta
- Flatbreads
- Italian-style breads
How to Apply:
Brush olive oil generously over the surface before baking. You can also drizzle it on after baking for extra flavor and shine.
When to Apply:
Before baking, or after for a flavor boost
Pro Tip: Use a high-quality olive oil — you'll taste it. This wash adds flavor, not just appearance. It's traditional for Mediterranean breads and pairs beautifully with herbs like rosemary or sea salt.
Quick Reference: Which Wash Should I Use?
Not sure which wash to reach for? Use this cheat sheet to match your bread type to the right finish.
I want a glossy, professional-looking finish
→ Whole egg wash (egg + water)
I want the deepest, richest golden color
→ Egg yolk wash (yolk + cream)
I want shine without extra browning
→ Egg white wash (white + water)
I want a soft, tender crust
→ Milk or cream wash, or butter wash after baking
I want a crispy, crackly, artisan-style crust
→ Water or steam
I want to add flavor, not just appearance
→ Olive oil wash or butter wash
I’m baking soft rolls or biscuits
→ Milk wash before baking, then butter wash after
Common Wash Mistakes (and How to Avoid Them)
Mistake #1: Using a paper towel instead of a pastry brush
Paper towels absorb most of the wash and can tear fragile dough. A soft-bristle pastry brush gives you control, even coverage, and doesn’t waste your wash. Silicone brushes are easy to clean and last forever.
Mistake #2: Applying the wash too early
If you brush on the wash and let the dough sit for too long, it can dry out or get reabsorbed. Apply the wash right before the bread goes into the oven. The only exception is butter, which works best after baking.
Mistake #3: Brushing too hard
Dough is delicate after its final rise. If you press too hard with the brush, you’ll deflate it and lose oven spring. Use light, gentle strokes. Think of it like painting, not scrubbing.
Mistake #4: Letting egg wash pool in score marks
If you’re scoring your bread, be careful not to let egg wash settle into the cuts. It can glue them shut and prevent the bread from expanding properly. Brush lightly and avoid over-saturating scored areas.
Mistake #5: Using too much wash
A thin, even layer is all you need. Too much wash creates a thick, uneven film that can taste eggy or look blotchy. One light coat is enough. Two coats can work for extra shine, but let the first coat dry slightly before applying the second.
Tips From Our Kitchen
Always use a pastry brush, not a paper towel
A soft-bristle pastry brush gives you control and even coverage. Paper towels absorb too much of the wash and can tear delicate dough.
Use gentle strokes
Dough is fragile after its final rise. Brush lightly to avoid deflating it. If you're too rough, you'll lose oven spring and end up with a flatter loaf.
Apply right before baking (except butter)
Most washes should go on just before the bread enters the oven. If you apply too early, the wash can dry out or get reabsorbed into the dough. Butter is the exception — it works best after baking.
Don't let egg wash pool in score marks
If you're scoring your bread, be careful not to let egg wash settle into the cuts. It can glue them shut and prevent the bread from expanding properly.
You can combine washes for layered effects
For example: egg wash for color and shine, then butter after baking for extra softness. Or water for steam, then a light milk wash halfway through baking for color.
Washes with fat (egg, milk, butter, oil) brown faster
Keep an eye on your bread. If it's browning too quickly, tent it loosely with foil for the last few minutes of baking.
The Final Brush
The wash is the last thing you do before your bread goes into the oven. It’s a small step, but it’s the one that defines how your bread looks — and often how it tastes.
Egg wash for shine and color. Milk for softness. Water for crunch. Butter for tenderness. Each one has a purpose. And now you know exactly which to use, when to use it, and how to apply it properly.
No more guessing. No more pale loaves or sticky, over-brushed surfaces. Just the right finish, every time. And if you’re serious about your bread, the right tools make all the difference. A good pastry brush. A reliable dough scraper. A sharp lame for clean scores. They won’t make you a better baker overnight, but they’ll make the process smoother — and the results more consistent.